Init OpenStack Environment
This document shows how to initialize new environment on OpenStack.
Step 1: Prepare an OpenStack environment
Prerequisites
-
An OpenStack environment running one of the supported releases. See bosh-openstack-cpi for information on the CPI's support policy.
-
The following OpenStack services:
- Identity: BOSH authenticates credentials and retrieves the endpoint URLs for other OpenStack services.
- Compute: BOSH boots new VMs, assigns floating IPs to VMs, and creates and attaches volumes to VMs.
- Image: BOSH stores stemcells using the Image service.
- (Optional) OpenStack Networking: Provides network scaling and automated management functions that are useful when deploying complex distributed systems. Note: OpenStack networking is used as default as of v28 of the OpenStack CPI. To disable the use of the OpenStack Networking project, see Customize the Deployment.
-
Access to an existing OpenStack project.
-
The following OpenStack networks:
- An external network with a subnet, that can assign a floating IP.
- A private network with a subnet. The subnet must have an IP address allocation pool. Will be created by Terraform automatically.
-
OpenStack flavor
m1.xlargeThe flavor is hard coded inbosh-deployment/openstack/cpi.yml. -
A security group, optionally created via terraform, that allows communication to the director and BOSH traffic within the group. With the
create-envcommand described below, this security group is used for the BOSH VM itself and is the default for all VMs deployed by BOSH. If you want to use separate security groups for deployments, overwrite the default in thecloud_propertiessection of the cloud config.
Configuration of a new OpenStack Project
Automated Configuration
You can use a Terraform environment template to configure your OpenStack project.
You will need to create a terraform.tfvars file with information about the environment.
Applying the Terraform plan to the environment will output the variables necessary for "Step 2: Deploy".
Manual Configuration
Note
See the OpenStack documentation for help finding more information.
Instead of using Terraform, you can do the following things manually as described below:
- Create a Keypair.
- Create and configure Security Groups.
- Allocate a floating IP address.
Create a Keypair
-
Select Access & Security from the left navigation panel.
-
Select the Keypairs tab.
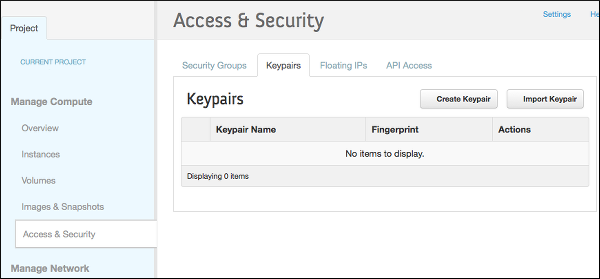
-
Click Create Keypair.
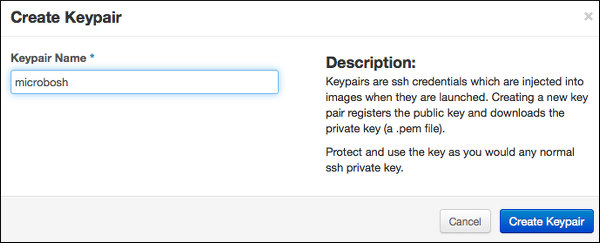
-
Name the keypair "bosh" and click Create Keypair.
-
Save the
bosh.pemfile to~/Downloads/bosh.pem.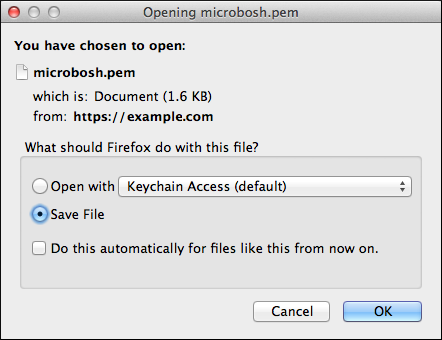
Create and Configure BOSH Security Group
You must create and configure a security group to restrict incoming network traffic to the BOSH VMs.
-
Select Access & Security from the left navigation panel.
-
Select the Security Groups tab.
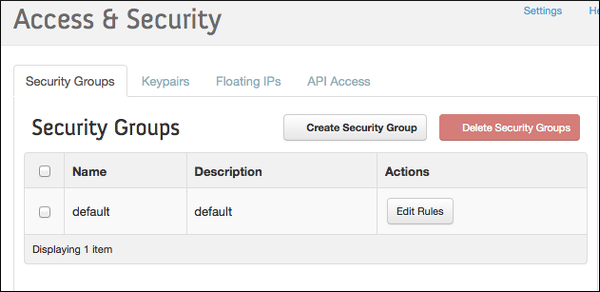
-
Click Create Security Group.
-
Name the security group "bosh" and add the description "BOSH Security Group"
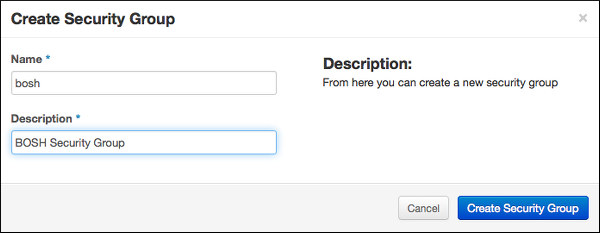
-
Click Create Security Group.
-
Select the BOSH Security Group and click Edit Rules.
-
Click Add Rule.
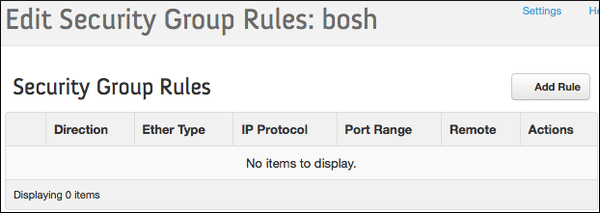
-
Add the following rules to the BOSH Security Group:
Warning
It highly discouraged to run any production environment with
0.0.0.0/0source or to make any BOSH management ports publicly accessible.Direction Ether Type IP Protocol Port Range Remote Purpose Ingress IPv4 TCP 22 0.0.0.0/0 (CIDR) SSH access from CLI Ingress IPv4 TCP 6868 0.0.0.0/0 (CIDR) BOSH Agent access from CLI Ingress IPv4 TCP 25555 0.0.0.0/0 (CIDR) BOSH Director access from CLI Egress IPv4 Any - 0.0.0.0/0 (CIDR) Egress IPv6 Any - ::/0 (CIDR) Ingress IPv4 TCP 1-65535 bosh Management and data access
Allocate a Floating IP Address
-
Select Access & Security from the left navigation panel.
-
Select the Floating IPs tab.
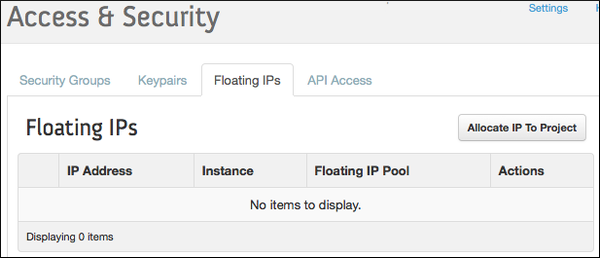
-
Click Allocate IP to Project.
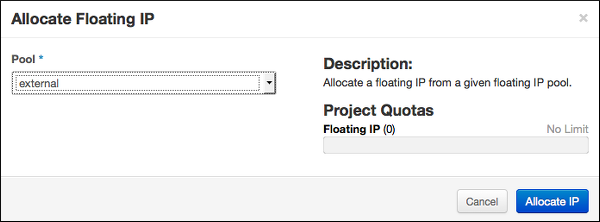
-
Select External from the Pool dropdown menu.
-
Click Allocate IP.
-
Replace
FLOATING-IPin your deployment manifest with the allocated Floating IP Address.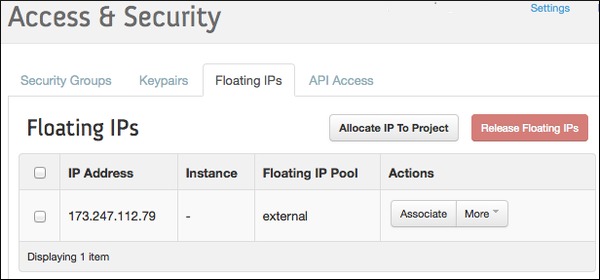
Step 2: Deploy
Prerequisites
Install CLI v2.
Collect Configuration Variables
Put all the configuration variables into a YAML file vars.yml. Alternatively you can pass them to create-env via separate -v switches on the command line.
---
director_name: bosh-1
internal_cidr: 10.0.1.0/24
internal_gw: 10.0.1.1
internal_ip: 10.0.1.10
auth_url: https://example.com:5000/v3
az: nova
default_key_name: microbosh
default_security_groups: [bosh]
net_id: <NET_ID>
openstack_domain: Default
openstack_username: <USERNAME>
openstack_password: <PASSWORD>
openstack_project: <PROJECT>
region: CustomRegion
We omit the private_key from the configuration file, so we don't have to escape multi-line strings in YAML.
Loading it directly from a file with --var-file, when deploying, will keep it intact.
The external_ip is only required for the external-ip-with-registry-not-recommended.yml ops file.
Warning
Do not commit vars.yml into public version control as it contains credentials. You could separate those into a second YAML file, i.e. creds.yml, and load both when deploying.
From Terraform
If you used Terraform as described in prerequisites you can use the output of terraform apply to build the configuration file.
The variable names from the Terraform output match those in the vars.yml.
Here is an example of the Terraform output section:
default_key_name = bosh-1
default_security_groups = [bosh]
external_ip = 192.168.1.19
internal_cidr = 10.0.1.0/24
internal_gw = 10.0.1.1
internal_ip = 10.0.1.10
net_dns = [172.1.0.1]
net_id = aaaaaaaa-d135-4d24-9b5a-aaaaaaaaaaaa
router_id = bbbbbbbb-80ad-4a43-8d04-bbbbbbbbbbbb
Manually
If you configured the environment manually, instead of using Terraform, downloading the RC file from OpenStack might help with figuring out the required values, like the auth_url, region and openstack_domain.
The openstack_domain is the OpenStack domain of the user account.
The az is probably just nova, you can use the OpenStack CLI to list available AZs: openstack availability zone list.
The net_id and internal_cidr, internal_gw and internal_ip variables belong to the private subnet mentioned in prerequisites.
The default_key_name matches the name of the SSH key for new VMs generated above.
The default_security_groups matches the name of the group created for bosh above.
The external_ip was acquired by allocating a floating IP earlier in this documentation.
Deploy the Director
Use bosh create-env command to deploy the Director.
# Create directory to keep state
mkdir bosh-1 && cd bosh-1

# Clone Director templates
git clone https://github.com/cloudfoundry/bosh-deployment

# Copy the `bosh.pem` generated earlier here
cp ~/Downloads/bosh.pem .

# Deploy the Director, all configuration variables are stored in `vars.yml`
bosh create-env bosh-deployment/bosh.yml \
    --state=bosh-state.json \
    --vars-store=director-creds.yml \
    --vars-file=vars.yml \
    -o bosh-deployment/openstack/cpi.yml \
    -o bosh-deployment/external-ip-with-registry-not-recommended.yml \
    --var-file=private_key=bosh.pem
If running above commands inside of an OpenStack network, i.e. if the bosh CLI is installed on a jump host, we can omit the external-ip-with-registry-not-recommended.yml ops file and optionally remove external_ip: from the vars.yml. Then we would have to connect to the internal IP directly. Refer to Exposing environment on a public IP for additional information.
Warning
It highly discouraged to expose the BOSH directors management ports in an production environment. The default security group allows access to these ports.
The IP is used in generated SSL certificates, make sure to change or remove the director-creds.yml variable store after changing the IP to regenerate the certificates.
See OpenStack CPI errors for list of common errors and resolutions.
Customize the Deployment
- using internal DNS, i.e. if it is required to resolve the OpenStack API endpoint: bosh-deployment/misc/dns.yml
- using
boot-from-volumeto have nova create the boot volume as a cinder device (necessary for live-migration of VMs): bosh-deployment/openstack/boot-from-volume.yml - using a custom CA for your OpenStack endpoints: bosh-deployment/openstack/custom-ca.yml
- putting additional trusted certificates into the cert-store of deployed VMs: bosh-deployment/openstack/trusted-certs.yml
- using a custom ntp server for deployed VMs: bosh-deployment/misc/ntp.yml
- using keystone v2 instead of keystone v3: bosh-deployment/openstack/keystone-v2.yml
- enable soft anti affinity for each instance group: bosh-deployment/openstack/auto-anti-affinity.yml
- disable human readable VM names and use UUIDs instead: bosh-deployment/openstack/disable-readable-vm-names.yml
- using nova networking instead of neutron networking: bosh-deployment/openstack/nova-networking.yml
- enable native CPI disk resizing: bosh-deployment/misc/cpi-resize-disk.yml
Connect to the Director
# Configure local alias
bosh alias-env bosh-1 -e 192.168.1.19 --ca-cert <(bosh int ./director-creds.yml --path /director_ssl/ca)

# Log in to the Director
export BOSH_CLIENT=admin
export BOSH_CLIENT_SECRET=`bosh int ./director-creds.yml --path /admin_password`

# Query the Director for more info
bosh -e bosh-1 env
Depending on previous choices you might have to use the internal IP instead of external_ip.
Instead of using alias-env and -e, you can set the environment variable BOSH_ENVIRONMENT to the IP of your director:
export BOSH_ENVIRONMENT=`bosh int vars.yml --path /external_ip`
If you require a custom CA, set BOSH_CA_CERT too:
export BOSH_CA_CERT=`bosh int director-creds.yml --path /director_ssl/ca`
Save Deployment State
Save the deployment state files left in your deployment directory bosh-1 so you can later update/delete your Director. See Deployment state for details.
You always need the JSON state file, as it contains OpenStack IDs of most objects, like volumes and VMs.
However you don't need the actual manifest, as you can recreate it by by running interpolate instead of create-env:
# Deploy the Director, all configuration variables are stored in `vars.yml`
bosh interpolate bosh-deployment/bosh.yml \
    --vars-store=director-creds.yml \
    --vars-file=vars.yml \
    -o bosh-deployment/openstack/cpi.yml \
    -o bosh-deployment/external-ip-with-registry-not-recommended.yml \
    -v external_ip=FLOATING-IP \
    --var-file=private_key=bosh.pem | tee bosh.yml
Update Cloud Config
Once the director is deployed, you probably want to upload a cloud config with IaaS specific configuration for your deployments. The vars.yml contains most values, except custom DNS, necessary to interpolate the cloud config from bosh-deployment/openstack/cloud-config.yml:
bosh update-cloud-config \
    --vars-file=vars.yml \
    bosh-deployment/openstack/cloud-config.yml